Posted on Apr 2nd 2014 by trekprops.de.
If you want to make more than one unit of any given prop replica, it is inevitable to make molds of all the parts you need. This way you’ll be able to make multiple resin casts of each piece. For the Neutrino Probe, this presented a few unique challenges I had to tackle along the way due to the special nature of the body, its prototype parts and the fact that I wanted to put electronics in there. In this blog post I’ll show you exactly what I thought would work, what did’t work and – most importantly – what I ended up doing. [More…]
Posted on Aug 8th 2013 by trekprops.de.
Following my recent “show-off” post presenting my Voyager Desktop Computer, let’s now have a detailed look at how I built this prop, going through every step, from the raw parts all the way to the finished unit, covering the concepts of different aspects of the prop, the construction of several custom parts, the installation of the electronics and the assembly of everything to bring it all together. Although I didn’t snap an image of every step along the way, it’s more than a hundred progress pictures, so I hope you brought a little time… [More…]
Posted on Nov 19th 2010 by trekprops.de.
 Well, well, well, what do we have here? Might that be a long overdue update on the Neutrino Probe project? “No, that’s impossible!”, you might think. After all, the last update was almost exactly one year ago! How could this still be a go? Well, you better believe it ’cause this baby is alive and kickin’! Still not positive? Jump past the break to look for yourself. Have you ever been told that you’re hard to convince of something? [More…]
Posted on Feb 17th 2006 by trekprops.de.
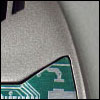 When I got my mobile holo-emitter in an exchange deal, there were some things I didn’t like about it: First off, the curcuit graphic which had been made from a gold foil with the pattern printed green on it was not cut out accurately thus being too small for the intended place. This was especially distracting in the upper right corner of the indentation where the gap was really quite big. Second, the surface of the prop wasn’t really worked up to the degree of a smooth finish I would have liked to have. [More…]
Posted on Dec 23rd 2005 by trekprops.de.
To fill very small air bubbles or deep scratches in resin castings I use spot putty available in automotive stores. That stuff is normally used to fill scratches in similar colored car finishes and is ready to use right out of the tube – no need to mix two components or anything. The material is curing very quickly and can be sanded to a very smooth surface. I chose the color red because it is easily visible on beige resin or grey primer. [More…]
Posted on Dec 23rd 2005 by trekprops.de.
To fill large areas, for example seams of two part resin castings or glueing joints, I use an automotive polyester filler. The same material is used to fix rusted areas on a car. It is mixed with a hardener and cures within a few mintes to a cream white color. It sands and polishes extremely well (it even can be drilled) after only 15 minutes. You can also use it as a glue for low stress joints. [More…]
Posted on Oct 30th 2005 by trekprops.de.
 Welcome to the online assembly instructions for my ODN scanner hero kit. In this tutorial, you’ll see how to prepare the electronics for installation and how to insert them into the body. You’ll also learn how to prepare and assemble the hollow resin shells to build up a fully functional hero ODN scanner. First, here’s a pic of the entire kit: 2 resin body parts, electronics, acrylic rod, display graphics, styrene (1.0 mm and 1.5 mm), 2 screws, templates for the styrene details. That’s all you need, so let’s begin! [More…]
Posted on Oct 28th 2005 by trekprops.de.
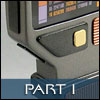 Welcome to the first part of my progress report covering the creation of my ODN Scanner! In this part I will show you how I scratchbuilt the prototype (the so-called master model) of this prop that I will later cast in resin. Part II and the Tutorial will then cover how I did the silicone rubber mold and how to build up one of the resulting kits. [More…]
Posted on Apr 24th 2005 by trekprops.de.
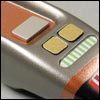 The Type I phaser from TNG, a prop barely 9 centimetres long. To do a replica of this can’t be much trouble, right? Wrong! The smaller the object is, the finer are the details and the more time has to be spent to make the prop look good. I will describe here what I did to build this “cricket” phaser up. When I got the kit from a member of the ASAP board , it was in a pretty raw shape, which is not uncommon for resin castings however. This meant that the surface had to be smoothed out (especially [More…]
Posted on Feb 24th 2005 by trekprops.de.
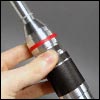 In this tutorial I will describe the process of building one of my resin Sonic Driver prop kits. Though it’s a relatively simple kit that essentially just needs to be painted, the partially complex shape of the prop can make the preparation work quite tricky and requires some expertise. [More…]


 Well, well, well, what do we have here? Might that be a long overdue update on the
  When I got my mobile holo-emitter in an exchange deal, there were some things I didn’t like about it: First off, the curcuit graphic which had been made from a gold foil with the pattern printed green on it was not cut out accurately thus being too small for the intended place. This was especially distracting in the upper right corner of the indentation where the gap was really quite big. Second, the surface of the prop wasn’t really worked up to the degree of a smooth finish I would have liked to have.
  Welcome to the online assembly instructions for my ODN scanner hero kit. In this tutorial, you’ll see how to prepare the electronics for installation and how to insert them into the body. You’ll also learn how to prepare and assemble the hollow
  Welcome to the first part of my progress report covering the creation of my ODN Scanner! In this part I will show you how I scratchbuilt the prototype (the so-called master model) of this prop that I will later cast in
  The Type I phaser from TNG, a prop barely 9 centimetres long. To do a replica of this can’t be much trouble, right? Wrong! The smaller the object is, the finer are the details and the more time has to be spent to make the prop look good. I will describe here what I did to build this “cricket” phaser up. When I got the kit from a member of the
  In this tutorial I will describe the process of building one of my resin Sonic Driver prop kits. Though it’s a relatively simple kit that essentially just needs to be painted, the partially complex shape of the prop can make the preparation work quite tricky and requires some expertise.