Work in Progress: Neutrino Probe – Casting
 If you know me, then you also know that my blog posts can get a bit lengthy at times. This one, however, I will try to keep a bit shorter than usual. What I want to describe to you however are some of the problems that presented themselves while casting the Neutrino Probe components for which I have all the molds now. Also, I tried a few new techniques with these parts to improve the appearance of the product and make the assembly process easier. What new techniques you ask? Read on to find out.
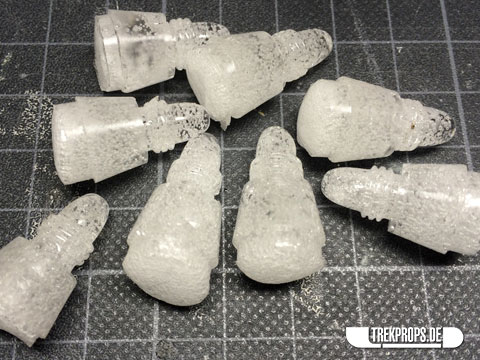
First, here are all of the resin pieces that I have created from my silicone rubber molds:
The first and obviously difficult thing to do was to cast the emitter tip in clear resin. Its small size and my desire to make it as bubble-free as possible caused me a few headaches, but I managed to wangle it quite nicely. After my first few tries I was shattered however. The castings were not only full of bubbles, it looked like a can of soda had exploded inside the mold before the resin cured. It was that bad.
Of course I had the answer to this problem always in the back of my head: In my greenness I had foolishly attempted to pour the resin without degassing it first, because I shied away from the effort of building a vacuum chamber. No matter how cautiously I tried to mix the resin, the result was always a disaster.
So, I finally realized that there was no way around it: I had to build a vacuum chamber to be able to suck all of the trapped air bubbles out of the resin before pouring it into the mold. So I got myself a few components and started building: A small low-cost vacuum pump, a big stainless steel pot, some thick plexi as the lid, a flexible hose, a few connectors / valves and a rubber mat as a sealing gasket.
Putting it all together is pretty self-explainatory: I drilled two holes into the plexi, one for the hose that is connected to the pump and one for the valve which enabled me to re-pressurize the pot after the procedure. Then I connected the hose and added the rubber mat to the underside of the plexi to make the lid airtight.
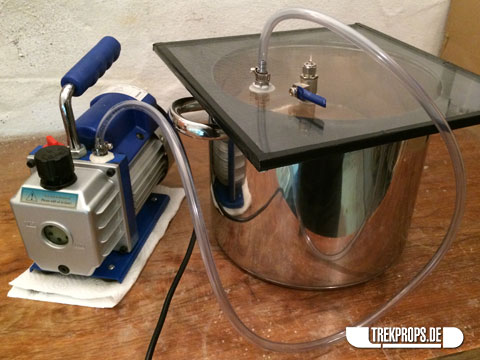
Et voilà – my very own vacuum chamber! Not as difficult to build as I thought and it works like a charm! 🙂 Resin degassed in there is almost bubble-free and cures beautifully.
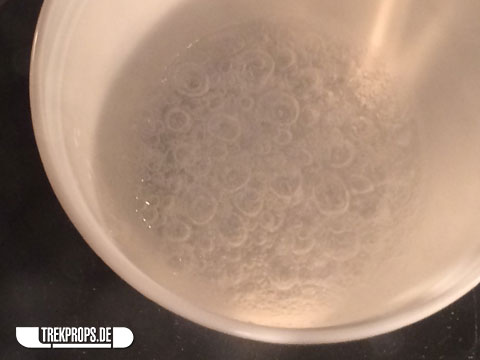
Looking at the degassing procedure makes clear how impossible it is to get a bubble-free casting without it. There are a lot more tiny bubbles inside a resin mixture than you would ever imagine. Exposing them to a vacuum makes them visible, lets them grow bigger, rise to the surface and finally breaks them.
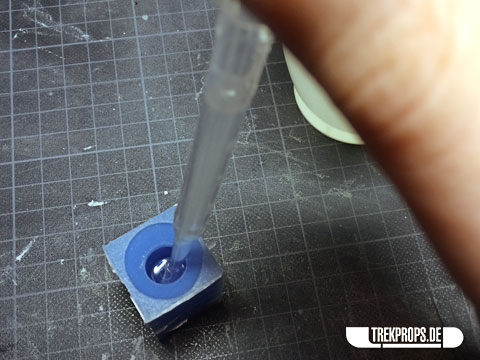
Bubbles or not, it is still very difficult to get the resin inside a mold this small though, because it is quite viscous. I use disposable pipettes to be able to allot the resin in small doses.
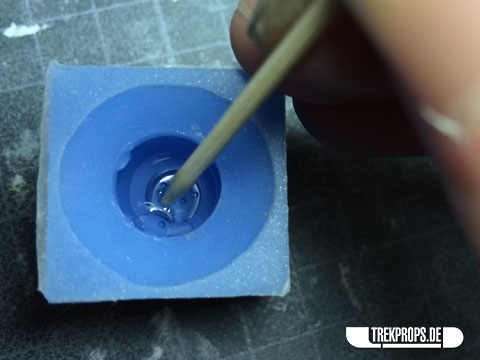
After the mold is about half-way full, I stop and use a toothpick to catch any bubbles that might have been caught inside the mold and try to push them away from the inner mold wall. This way no holes are created in the casting, even though those bubbles are still trapped inside and obviously visible. That’s not always possible to prevent. When I think I got them all, I continue and fill up the mold.
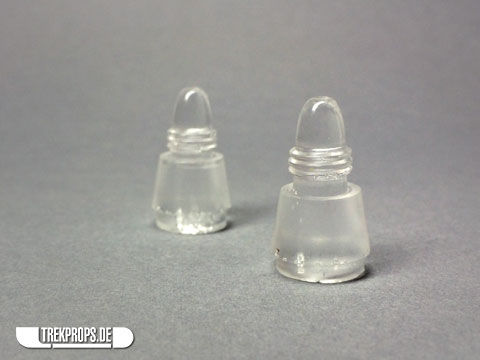
And here you can see the result. Almost bubble-free castings which will look fabulous when lit up by the electronics from behind.
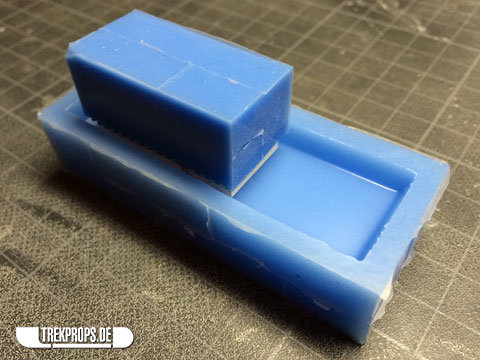
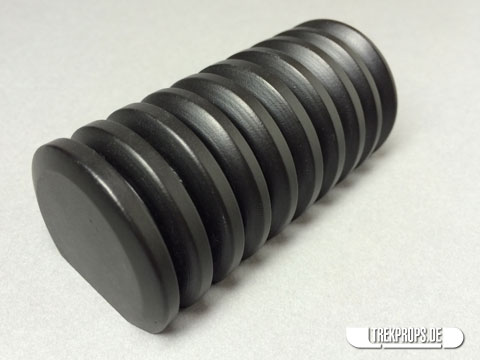
The next element that required a special casting technique was the display panel:
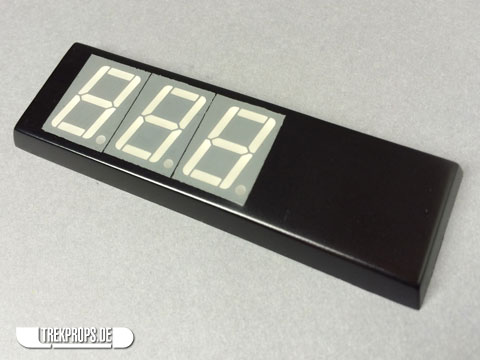
Well, it didn’t exactly require a special technique, but I decided to do it a little differently from how it might normally be done to make it look more seamless.
The normal way of casting this would be to incorporate a hole into the master model so that the electronics could be inserted into the casting, which naturally also would feature this “window”. The other possibility would have been to work this hole into each casting, similarly as I did with the battery door of my ODN Scanner replica. With this experience under my belt however, I decided that I didn’t want to do it like this again because it’s just too elaborate.
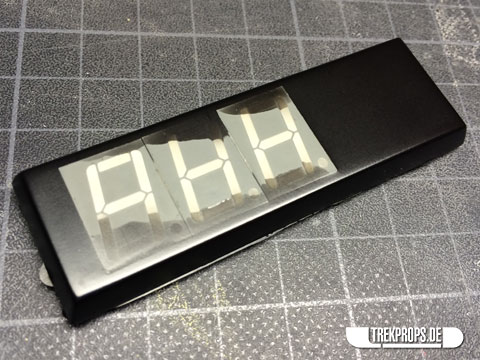
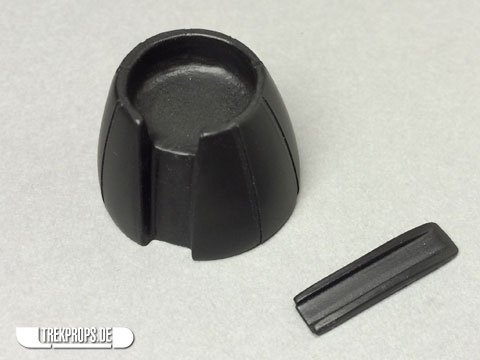
Instead I put the LED digits inside the mold before pouring in the resin. This way the electronics get embedded into the resin and actually become one with the panel itself.
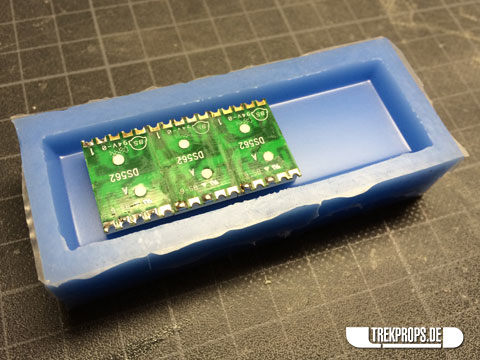
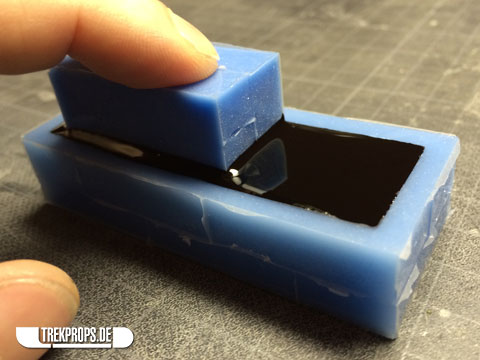
Doing this, a precise placement of the electronic components inside the mold is obviously vital. If they are not placed exactly right, they will later appear askew, which is of course not desirable. Also, the spaces from each short side must be enough to account for the screws and switches that are going to be placed there later.
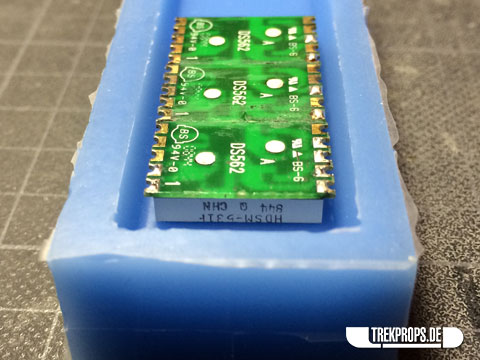
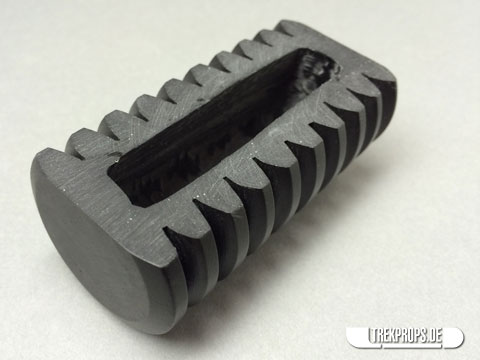
To be able to leave the soldering joints on the back of the LEDs blank, I used one of the smaller molds (the one from the Emitter Base Strip) as a placeholder to put the components in their place and keep the resin from completely encapsulating them. That’s also why I made the master model for the panel slightly thicker than the LED digits, to have some room to work with. Just in case you were wondering. 😉
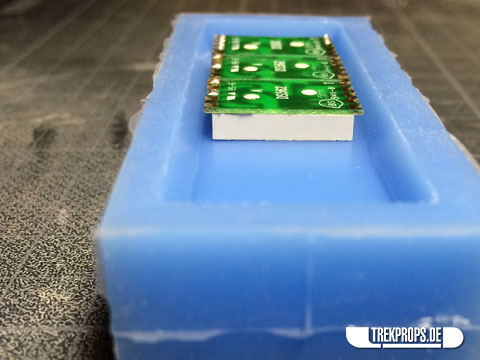
While pouring the resin inside the mold, I gently push down the placeholder to keep the resin from creeping under the LEDs and between them and the rubber placeholder piece.
Unfortunately it is impossible to prevent this resin creep completely. Some of it always manages to get where it shouldn’t:
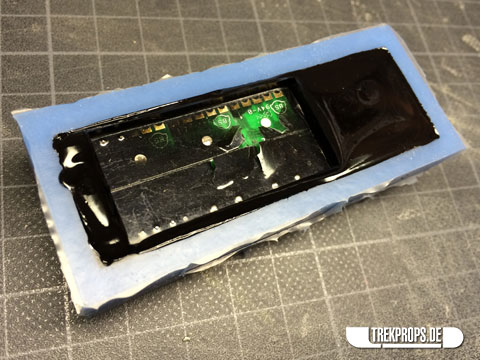
Thankfully thin layers of resin can be removed quite easily. After cleaning out all of the excess resin flash and sanding the surface flat, it looks like this:
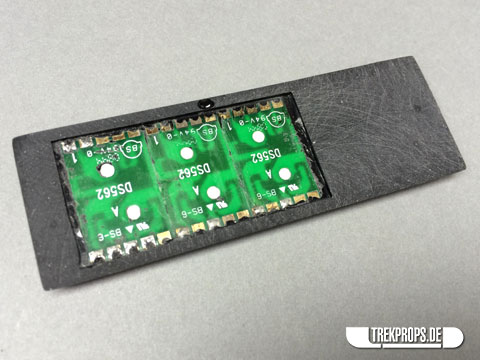
The front is also usually affected be resin creep, …
… but just as easy to clean up:
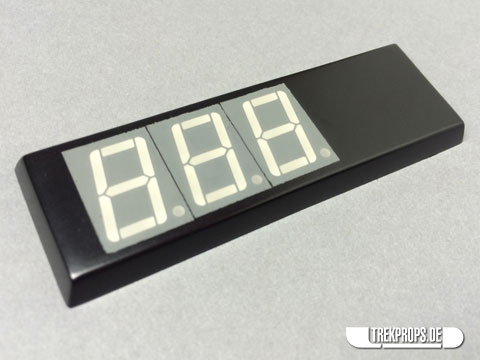
The result is an extremely sleek element that looks like it was made from one piece, because it essentially is. No ridges, no crevices. Smooth as an android’s bottom, as it were. 😉
As you can obviously see, I also experimented with dyeing the resin to make all the parts black. This worked so well that I won’t even have to prime and paint these parts since they basically look perfect right out of the mold. It’s also more accurate since the original prop was also made from black resin.
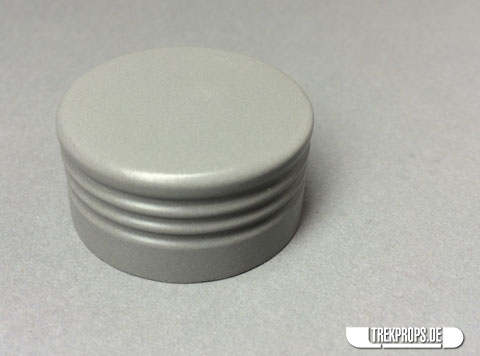
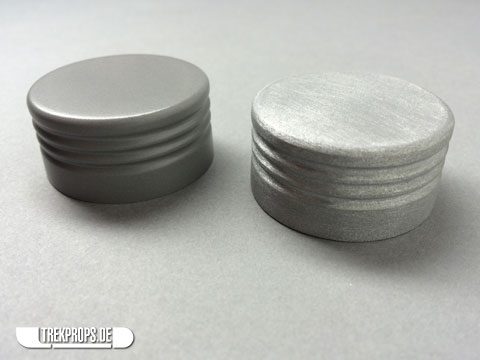
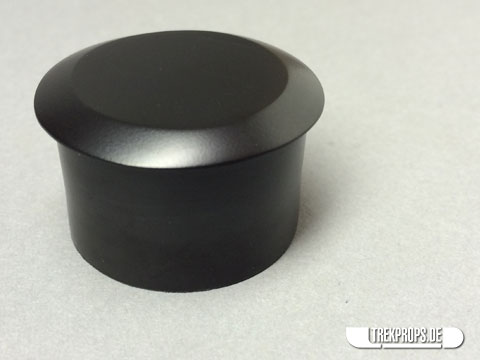
Following this thought, I also gave the end piece a special treatment to make it look like something made from metal rather than resin. To achieve this, I filled the resin with aluminum powder before pouring it into the mold. The more powder you use, the more the part will be made up from actual aluminum. And as such it will naturally look more like a metal piece, be a bit heavier than usual and also feel a little cold to the touch. Very cool indeed (pun intended) and a lot better than spray-painting a resin piece silver. 😉
Coming out of the mold, this is not immediately obvious, though. The part has a dark grey color with a slight yellow tint coming from the kind of resin I use which usually has a beige kind of color.
Once you sand over the whole piece however, the aluminum particles inside the resin show themselves and the surface gets nice and shiny, looking very metal-like. And the best part is that it is scratch-resistant since this metallic appearance is not only on the surface like a delicate layer of paint but comes from the material itself which is two thirds actual aluminum!
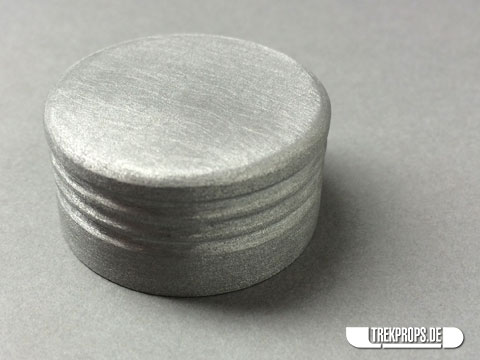
Here are both side by side to see the difference before and after sanding.
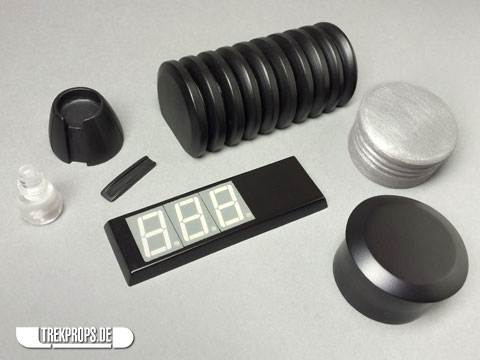
All the other parts were pretty straight forward: I dyed my resin black, filled the molds and got beautiful looking pieces out of them. Everything just looks more badass in black. 😉
And here are all of them together, again:
Not casting-related, but following up on my last blog post, I also wanted to show you what I’ll be using as the disc for the end cap. As I said in the last post, I wanted to use the real deal, which looked like acrylic to me from the photos of the original prop. So I got some discs lasered from 1mm thin black plexi by a fellow prop builder who has access to a laser cutter. Thanks again, Christoph! 🙂
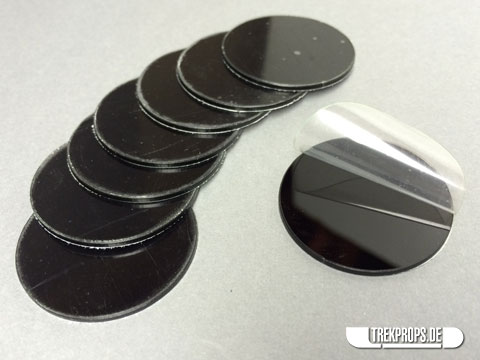
The disc will also serve as a door to conceal the charging port for the built-in rechargeable battery. If everything goes according to plan, the door will be screwed on to the actual charging port, looking totally seamless from outside, without any sign of a door. Just the way I like it and did it before with my Voyager Desktop Computer replica. 😉 More on that in the next post.
Now that I have everything I need, I can finally start assembling! Yay! 🙂
To watch my progress, follow me on Twitter @trekprops and be sure to check back here soon to see the finished replica. If you have any questions, please also feel free to leave a comment below or E-Mail me at info@trekprops.de.

2 Responses to “Work in Progress: Neutrino Probe – Casting”
Rizwan on: June 1st, 2014 at 20:36
Hello. Your site is fantastic. Do you make the props on your site for customers? I tried looking for an online shop but I couldn’t find it. I’d love to buy some of your props, or at least see how you made them so I could make them for my collection. Thank you 🙂
Superben100 on: December 14th, 2017 at 22:19
That looks sweet! Though can you build a bio-neural gel pack prop, too? I think it would look amazing!
Post a Comment
Want to see your picture next to your comment? Go get a Gravatar!