Posted on Aug 8th 2013 by trekprops.de.
Following my recent “show-off” post presenting my Voyager Desktop Computer, let’s now have a detailed look at how I built this prop, going through every step, from the raw parts all the way to the finished unit, covering the concepts of different aspects of the prop, the construction of several custom parts, the installation of the electronics and the assembly of everything to bring it all together. Although I didn’t snap an image of every step along the way, it’s more than a hundred progress pictures, so I hope you brought a little time… [More…]
Posted on Jan 14th 2008 by trekprops.de.

Ah, Starfleet cases. They come in all colors and shapes and I love all of them! Especially the ones that were used by the engineering staff to carry around their great little tools and instruments. But that’s not the only use for them, of course. They’re also very useful to store PADDs for example. And that’s exactly what Captain Picard uses his briefcase for in the TNG-Episode “Starship Mine” (6×18) when he leaves the ship, which is due for a Baryon sweep that requires a complete evacuation. [More…]
Posted on Feb 17th 2006 by trekprops.de.
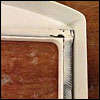
 When I got my mobile holo-emitter in an exchange deal, there were some things I didn’t like about it: First off, the curcuit graphic which had been made from a gold foil with the pattern printed green on it was not cut out accurately thus being too small for the intended place. This was especially distracting in the upper right corner of the indentation where the gap was really quite big. Second, the surface of the prop wasn’t really worked up to the degree of a smooth finish I would have liked to have. [More…]
Posted on Dec 23rd 2005 by trekprops.de.
One of the most important elements for the final appearance of a prop is the paint in the correct color. Usually automotive lacquers are used because they are relatively cheap and easy to get. That’s why they were also used to create most of the original props. However some people prefer to use an airbrush system. Remember: A surface painted with an automotive lacquer can of course be further treated with other automotive products such as car polish and wax. [More…]
Posted on Dec 23rd 2005 by trekprops.de.
Special kinds of spray paints are used to achieve certain effects on a surface. This chrome silver spray contains a high level of real metal particles thus creating a nearly mirror like finish. It’s however important to have a very smooth surface to make this happen. So, a lot of sanding is necessary for this. [More…]
Posted on Oct 30th 2005 by trekprops.de.
 Welcome to the online assembly instructions for my ODN scanner hero kit. In this tutorial, you’ll see how to prepare the electronics for installation and how to insert them into the body. You’ll also learn how to prepare and assemble the hollow resin shells to build up a fully functional hero ODN scanner. First, here’s a pic of the entire kit: 2 resin body parts, electronics, acrylic rod, display graphics, styrene (1.0 mm and 1.5 mm), 2 screws, templates for the styrene details. That’s all you need, so let’s begin! [More…]
Posted on Jun 20th 2005 by trekprops.de.
 How do you build a PADD? Well, it’s easy, if you have the right kit. In this tutorial I want to show you how to build up one of Matt Munson’s small Voyager PADD kits. Although he claims to build these is under an hour, I would recommend to take a little more time… [More…]
Posted on Apr 24th 2005 by trekprops.de.
 The Type I phaser from TNG, a prop barely 9 centimetres long. To do a replica of this can’t be much trouble, right? Wrong! The smaller the object is, the finer are the details and the more time has to be spent to make the prop look good. I will describe here what I did to build this “cricket” phaser up. When I got the kit from a member of the ASAP board , it was in a pretty raw shape, which is not uncommon for resin castings however. This meant that the surface had to be smoothed out (especially [More…]
Posted on Feb 24th 2005 by trekprops.de.
 In this tutorial I will describe the process of building one of my resin Sonic Driver prop kits. Though it’s a relatively simple kit that essentially just needs to be painted, the partially complex shape of the prop can make the preparation work quite tricky and requires some expertise. [More…]
