Posted on Aug 8th 2013 by trekprops.de.
Following my recent “show-off” post presenting my Voyager Desktop Computer, let’s now have a detailed look at how I built this prop, going through every step, from the raw parts all the way to the finished unit, covering the concepts of different aspects of the prop, the construction of several custom parts, the installation of the electronics and the assembly of everything to bring it all together. Although I didn’t snap an image of every step along the way, it’s more than a hundred progress pictures, so I hope you brought a little time… [More…]
Posted on Aug 6th 2013 by trekprops.de.
 Today I want to show you something very special. What makes it so special you ask? Well, for one, it took me many months to complete it and is probably the single most elaborate prop replica I’ve ever done. And the biggest one in terms of size and weight for sure. Also, it’s got a few surprises up its sleeve which I think you will like. Yes, you’ve read about it here before and yes, you might have seen me work on it on Twitter if you follow me there. Prepare yourself for lots of text and quite a lot of pictures, too! [More…]
Posted on Jul 5th 2013 by trekprops.de.
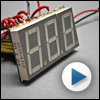 The heart of every prop are its electronics. Lights, blinking and flashing back and forth, maybe even a sound-module, this is what makes a prop feel authentic instantly. In case of my Neutrino Probe replica, it’s “only” lights, which doesn’t mean it’s boring however. Powered by a small rechargeable battery – which is a first for me by the way – this board will bring the engineering tool to life. But instead of describing it, I decided to make a video this time to show you and tell you all about it. What are you waiting for? Jump right in and watch! [More…]
Posted on Nov 8th 2009 by trekprops.de.
 There is one prop that I wanted to build forever and never got around to it. In fact, this goes back to the early days on ASAP, when I just got into the hobby. At that time, I didn’t have a lot of experience obviously and was just figuring out how to build stuff. So, after seeing this prop in “Star Trek: Captain’s Chair“, my first impulse was to build it because it looked cool and I had recognized it from the show. [More…]
Posted on Oct 30th 2005 by trekprops.de.
 Welcome to the online assembly instructions for my ODN scanner hero kit. In this tutorial, you’ll see how to prepare the electronics for installation and how to insert them into the body. You’ll also learn how to prepare and assemble the hollow resin shells to build up a fully functional hero ODN scanner. First, here’s a pic of the entire kit: 2 resin body parts, electronics, acrylic rod, display graphics, styrene (1.0 mm and 1.5 mm), 2 screws, templates for the styrene details. That’s all you need, so let’s begin! [More…]
Posted on Oct 24th 2005 by trekprops.de.
 Chief engineers using their wonderful high tech instruments to diagnose, calibrate and repair circuits and talking “technobabble” – that’s what I love about Star Trek! Geordi LaForge, Miles O’Brien and B’Elanna Torres are some of my favourite characters because they know every system and every technical detail on their ship inside and out – from waste disposal to the warp core. [More…]

 Today I want to show you something very special. What makes it so special you ask? Well, for one, it took me many months to complete it and is probably the single most elaborate prop replica I’ve ever done. And the biggest one in terms of size and weight for sure. Also, it’s got a few surprises up its sleeve which I think you will like. Yes, you’ve read about it here
  The heart of every prop are its electronics. Lights, blinking and flashing back and forth, maybe even a sound-module, this is what makes a prop feel authentic instantly. In case of my Neutrino Probe replica, it’s “only” lights, which doesn’t mean it’s boring however. Powered by a small rechargeable battery – which is a first for me by the way – this board will bring the engineering tool to life. But instead of describing it, I decided to make a video this time to show you and tell you all about it. What are you waiting for? Jump right in and watch!
  There is one prop that I wanted to build forever and never got around to it. In fact, this goes back to the early days on
  Welcome to the online assembly instructions for my ODN scanner hero kit. In this tutorial, you’ll see how to prepare the electronics for installation and how to insert them into the body. You’ll also learn how to prepare and assemble the hollow
  Chief engineers using their wonderful high tech instruments to diagnose, calibrate and repair circuits and talking “technobabble” – that’s what I love about Star Trek! Geordi LaForge, Miles O’Brien and B’Elanna Torres are some of my favourite characters because they know every system and every technical detail on their ship inside and out – from waste disposal to the warp core.